🔧 Step 1 — Access the API Settings
From your Agent Configuration page, open the “Tools” tab.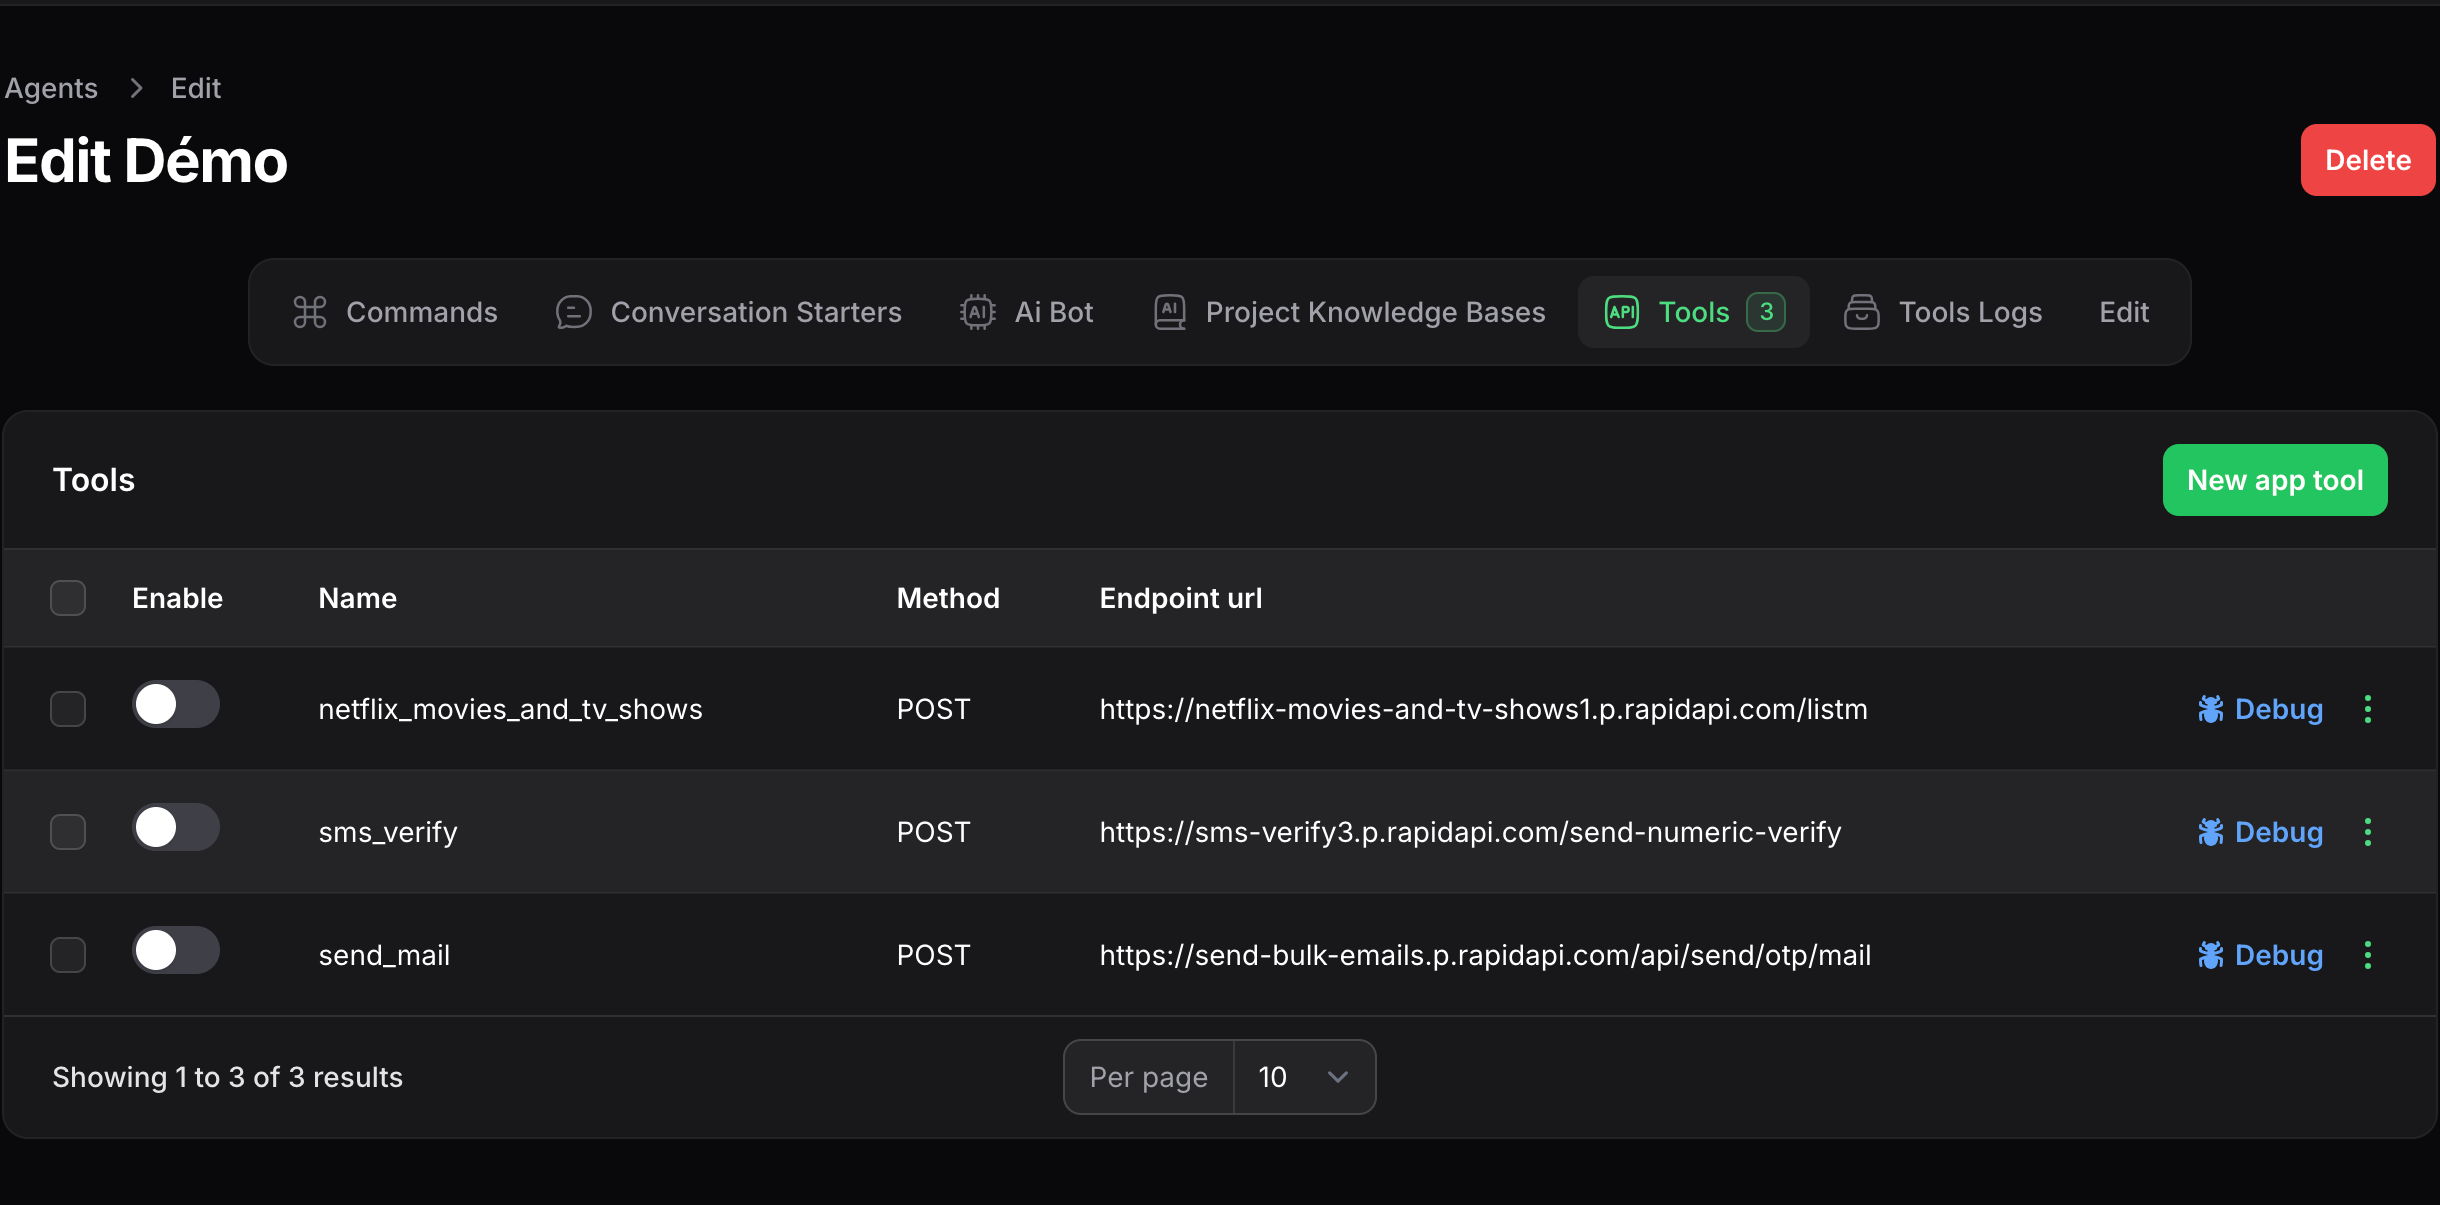
🧩 Step 2 — Add a New Tool
Click “New Tool” to define a new connection.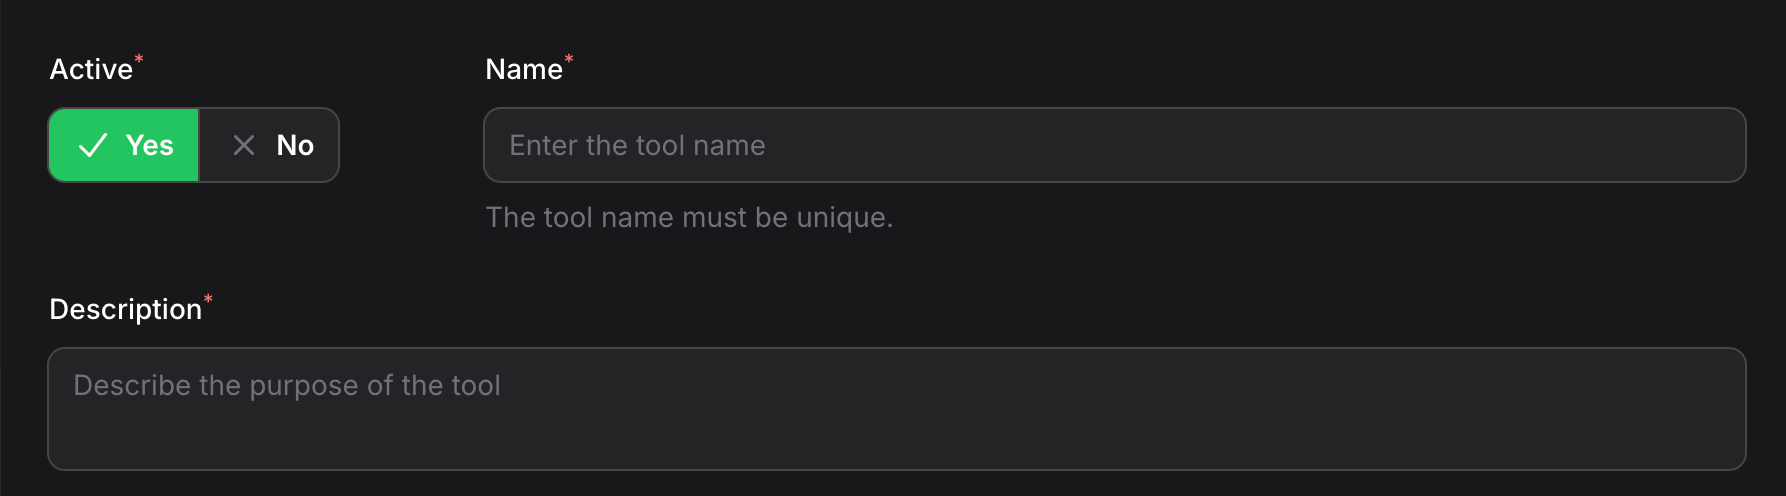
- Name — a friendly unique name in camelcase (e.g.,
payment_confirmationorget_orders) - State — if the tool can be use or not by the agent (e.g
disable when the api is under maintenance) - Description — note about what the API does to allow agent to understand when to use it
⚙️ Step 3 — Define Endpoint and headers
Set the endpoints that will be used to consume your service and the required headers such as token, api key.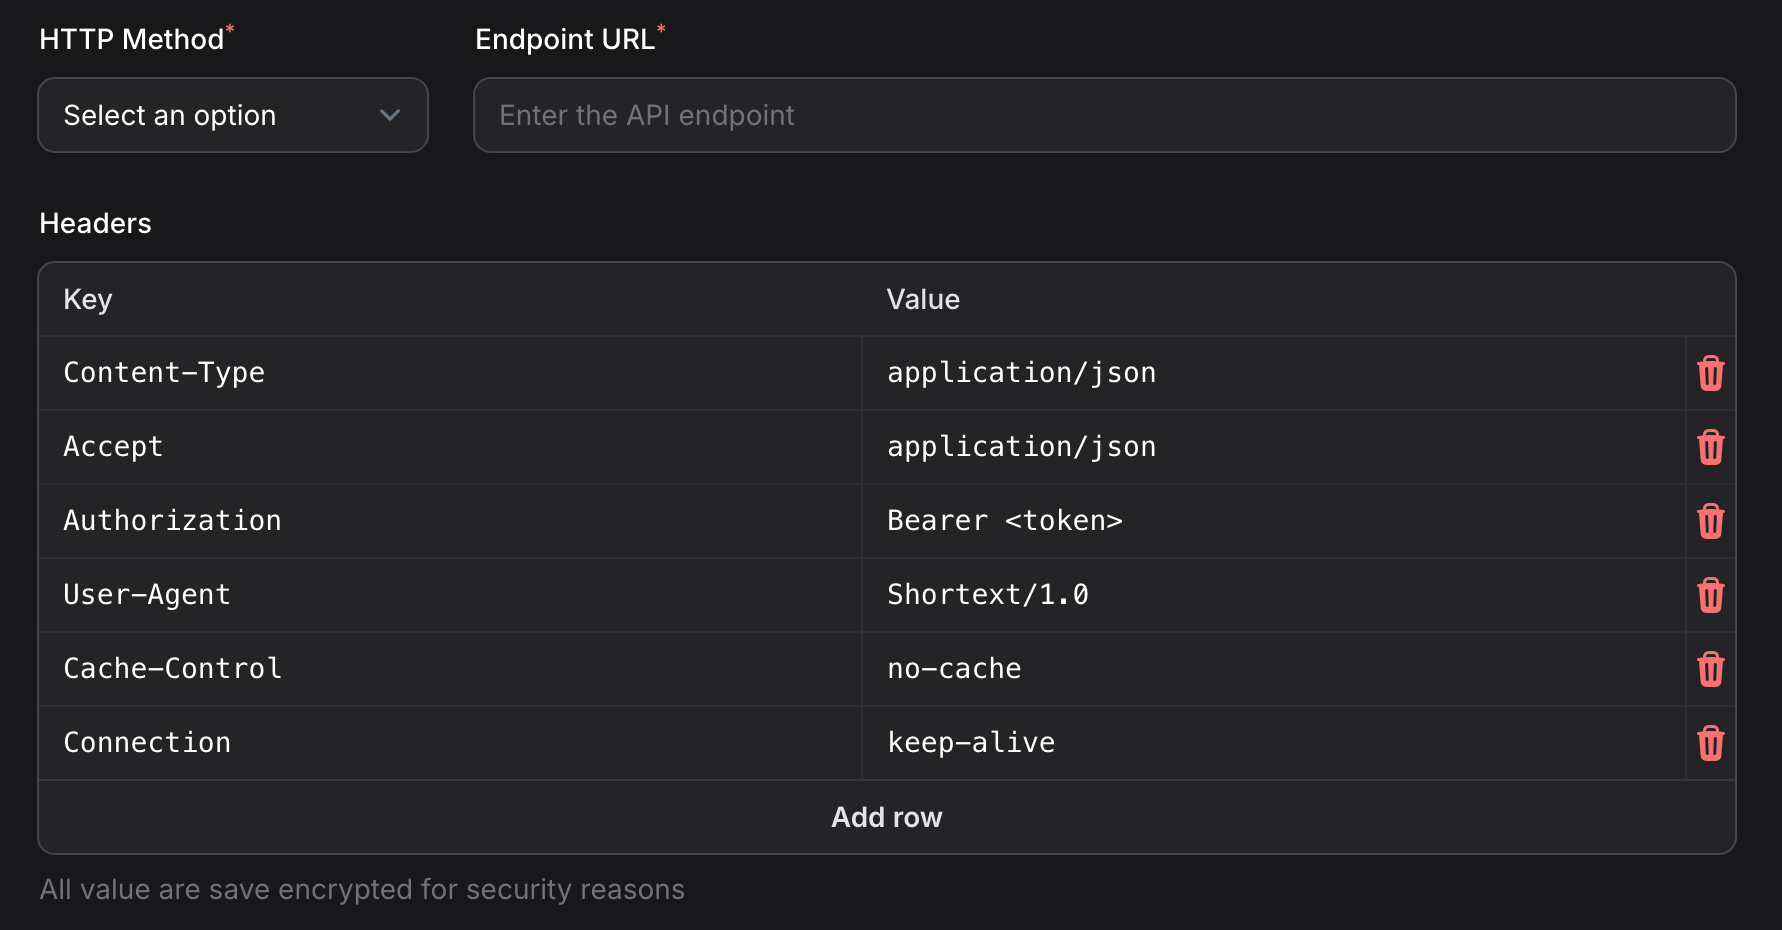
Sensitive data such as tokens or API keys are encrypted and stored securely.
- Method —
GET,POST,PUT,DELETE, etc. - Url — the full URL of your service (e.g.,
https://acme.com/users/{id}) - Headers — optional (for content type, authentication)
You can use variables like
{phone} or {email} in your paths.
These will be replaced dynamically from the user’s conversation context.⚙️ Step 3 — Define Request Body
Request Body — JSON or form data (for POST/PUT requests)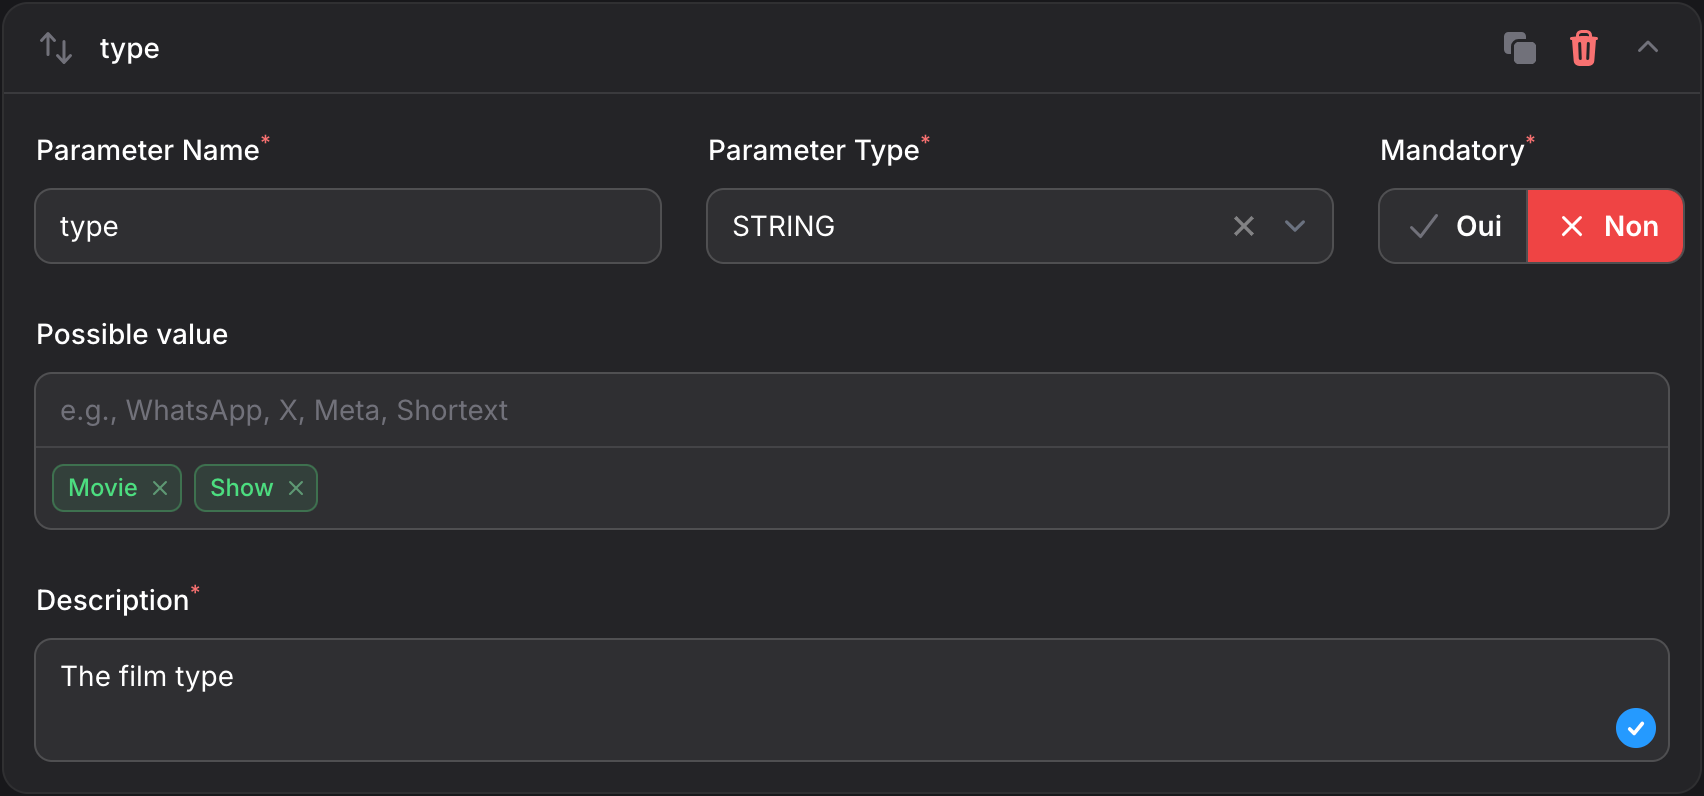
- Name — a friendly unique name (e.g.,
order_idorid). - Type — the parameter type
STRING,INTEGER,BOOLEAN. in case ofSTRING: possible values can be defined - Mandatory — if it should be set always present or not
- Description — note about what the parameter does to allow agent to understand how to fill it
🧠 Step 4 — Usage of the API Inside an Agent
Once your API is configured and enabled, you can make it callable from your agent’s workflow or rules. Example:
When a user says “Check my application status”, your agent can call:
Example:
When a user says “Check my application status”, your agent can call:
You can define conditions so that API calls are triggered only when specific user intents are detected.
🧪 Step 5 — Test the API Connection
Shortext provides a built-in API Tester so you can validate your setup before deploying it.
- Click on Debug on the endpoint you configured.
- Provide any parameters or payload required.
- Click “Run Test”.
- View the response logs and status code.
All test requests are logged for debugging. You can re-run tests as often as needed without affecting your live agents.
🧭 Step 6 — Monitor API Usage
After deployment, you can track how often your agents call APIs via the API Usage Log.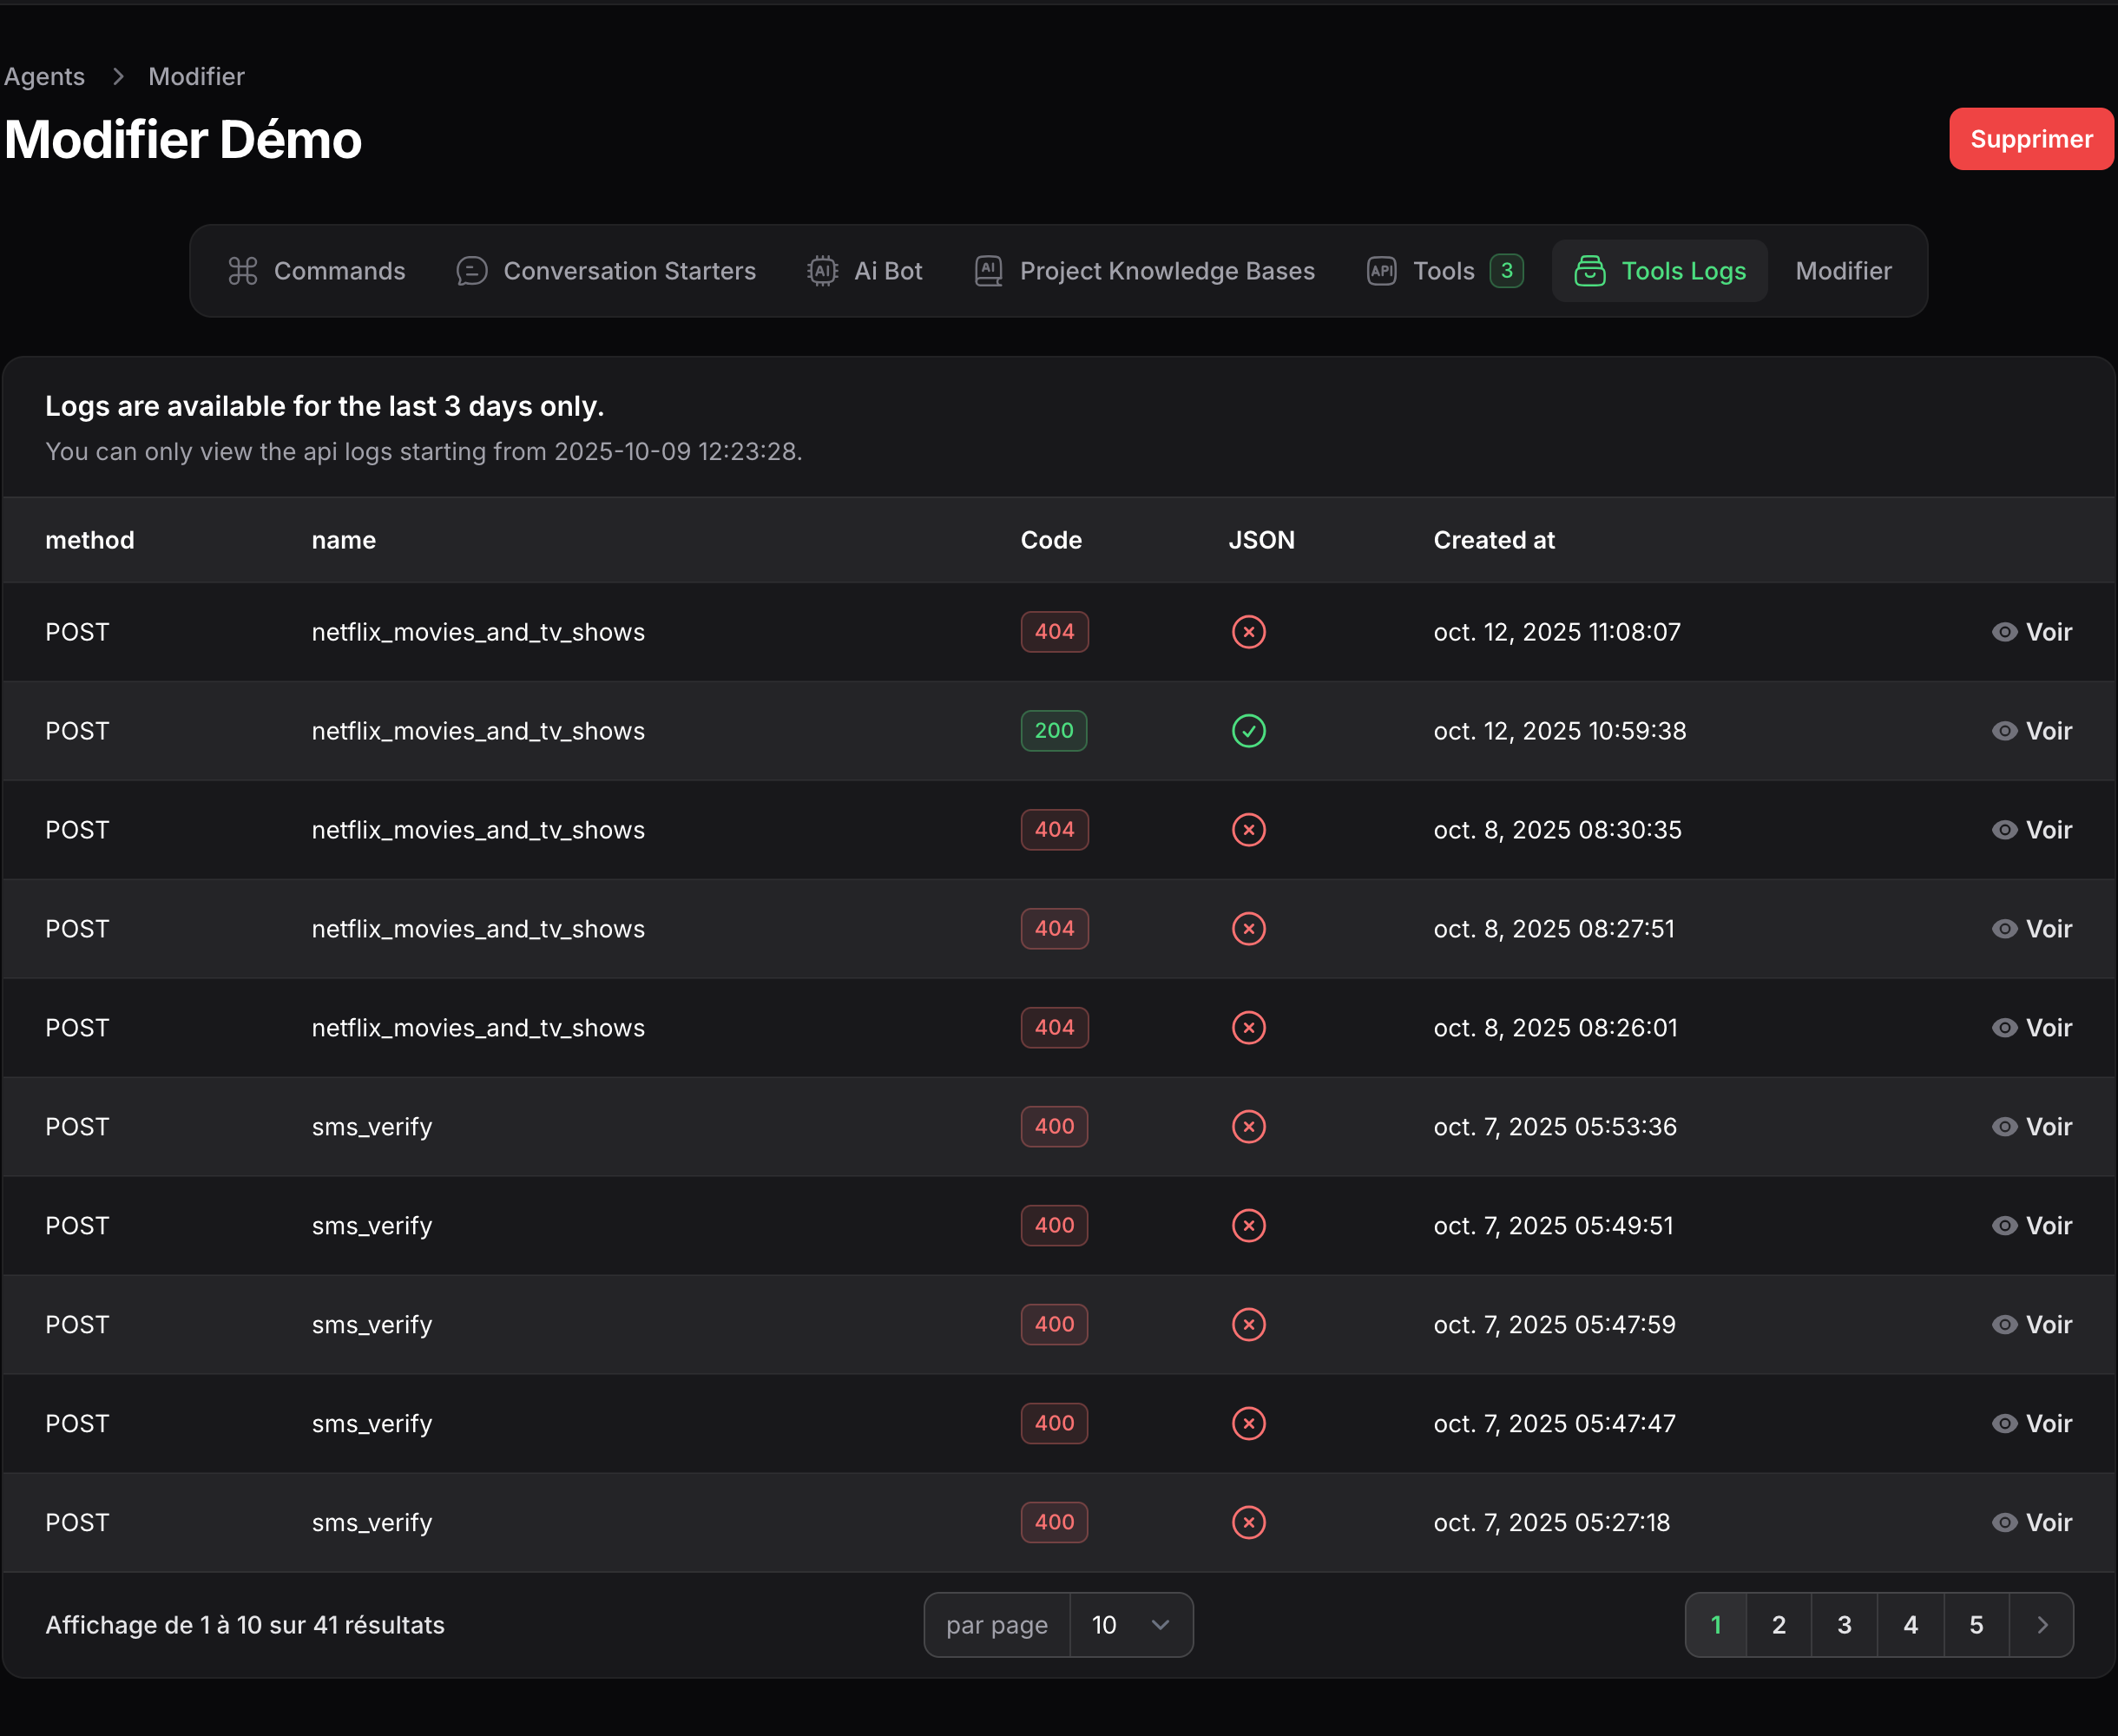
- Timestamps of API calls
- Response time and status
- Agent and user who triggered the call
- Error messages (if any)
Frequent or failed API calls may impact performance. Monitor this section to ensure stability.
🧰 Example Use Cases
Here are a few examples of how API connections can enhance your agents:| Use Case | Description | Example API |
|---|---|---|
| CRM Lookup | Fetch user info based on phone number | GET /users/{phone} |
| Order Tracking | Retrieve delivery updates | GET /orders/{id} |
| Payment Confirmation | Validate or trigger a transaction | POST /payments/verify |
| Ticket Creation | Send a complaint or issue to your system | POST /tickets/create |
🚀 Next Steps
Now that you’ve connected your APIs, you can:- Build Automations That Use API Data →
- Test Conversations with Live API Calls →
- View API Analytics and Logs →
Shortext APIs give your agents the power to act — not just respond.
With proper configuration, your bot can become a true workflow engine for your business.