> ## Documentation Index
> Fetch the complete documentation index at: https://docs.shortext.ny-corp.io/llms.txt
> Use this file to discover all available pages before exploring further.
# Creating an Account
> Learn how to create your Shortext account and access your dashboard in a few simple steps.
export const app = {
url: 'https://shortext.ny-corp.io'
};
Getting started with **Shortext** only takes a few minutes.
This guide will walk you through creating your account, verifying it, and exploring the main dashboard.
***
## 🪄 Step 1 — Sign Up
Go to **[{app.url}](\{app.url})** and click **“Create Account”**.
You can register using:
* Your **email address**, or
* A **third-party provider** (if enabled on your workspace).
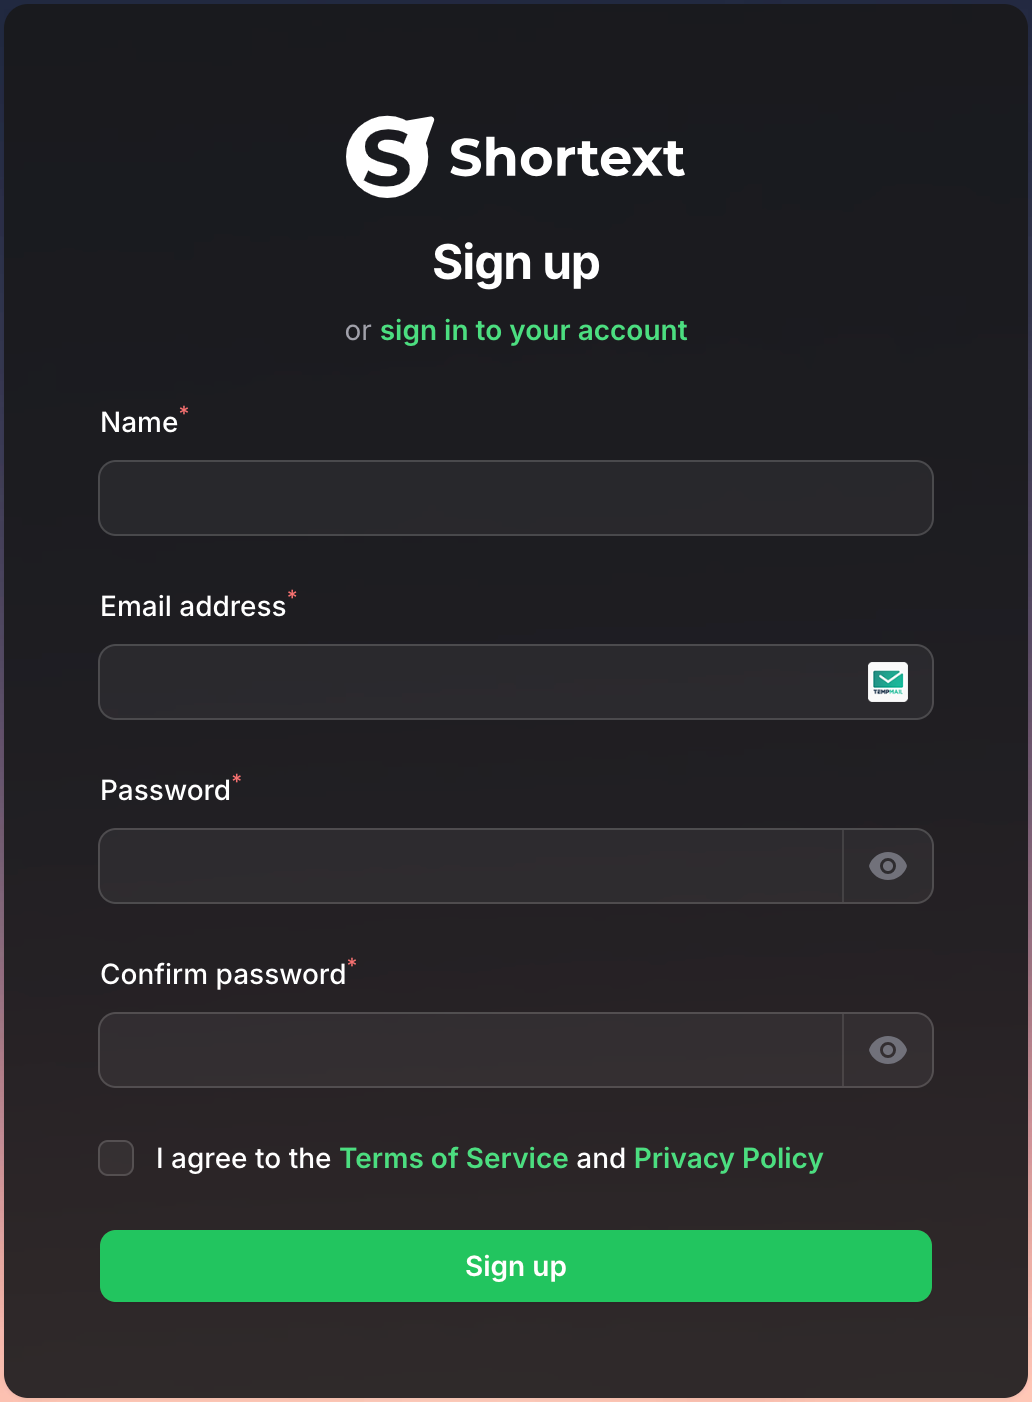 Use a valid business email to ensure smooth account verification and communication.
***
## 🧩 Step 2 — Verify Your Email
After signing up, you’ll receive a verification email.
Click the **“Verify Account”** button to activate your profile.
Use a valid business email to ensure smooth account verification and communication.
***
## 🧩 Step 2 — Verify Your Email
After signing up, you’ll receive a verification email.
Click the **“Verify Account”** button to activate your profile.
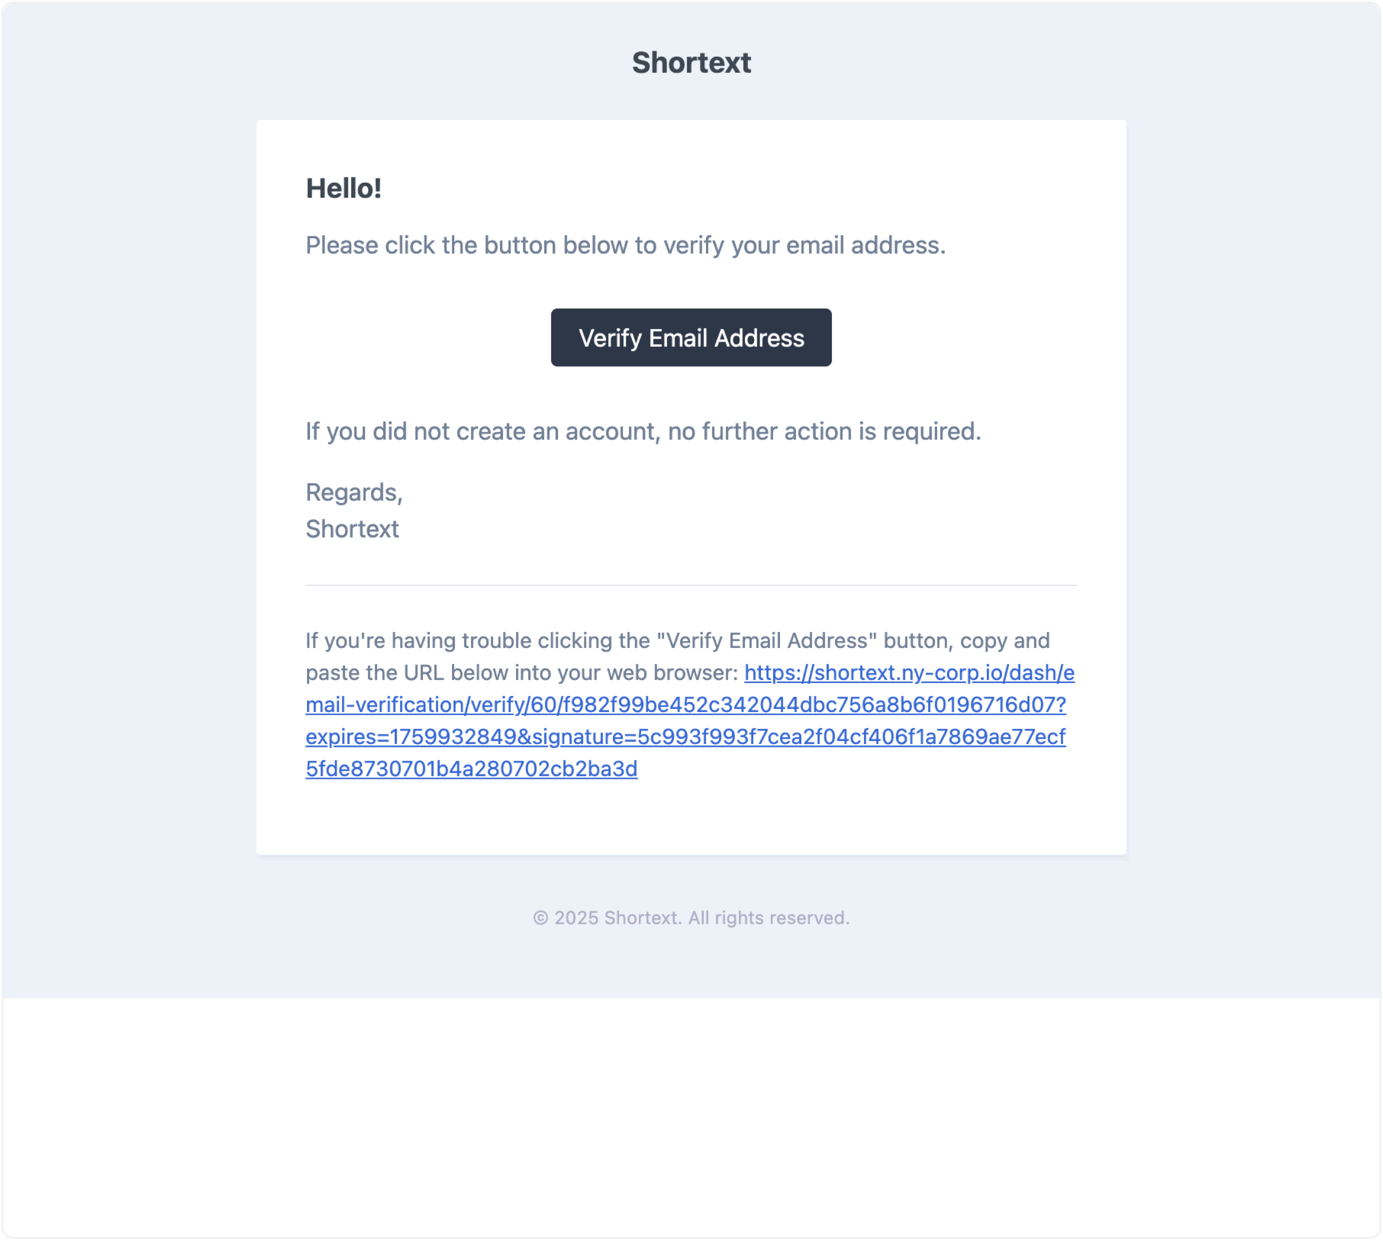 Once verified, you’ll be redirected automatically to your dashboard.
***
## 💼 Step 3 — Complete Your Profile
To personalize your experience, Shortext will ask for a few details:
* Your **Company or Project Name**
* Your **Primary Use Case** (e.g., Customer Support, Sales, Recruitment)
* Your **Country / Region**
Once verified, you’ll be redirected automatically to your dashboard.
***
## 💼 Step 3 — Complete Your Profile
To personalize your experience, Shortext will ask for a few details:
* Your **Company or Project Name**
* Your **Primary Use Case** (e.g., Customer Support, Sales, Recruitment)
* Your **Country / Region**
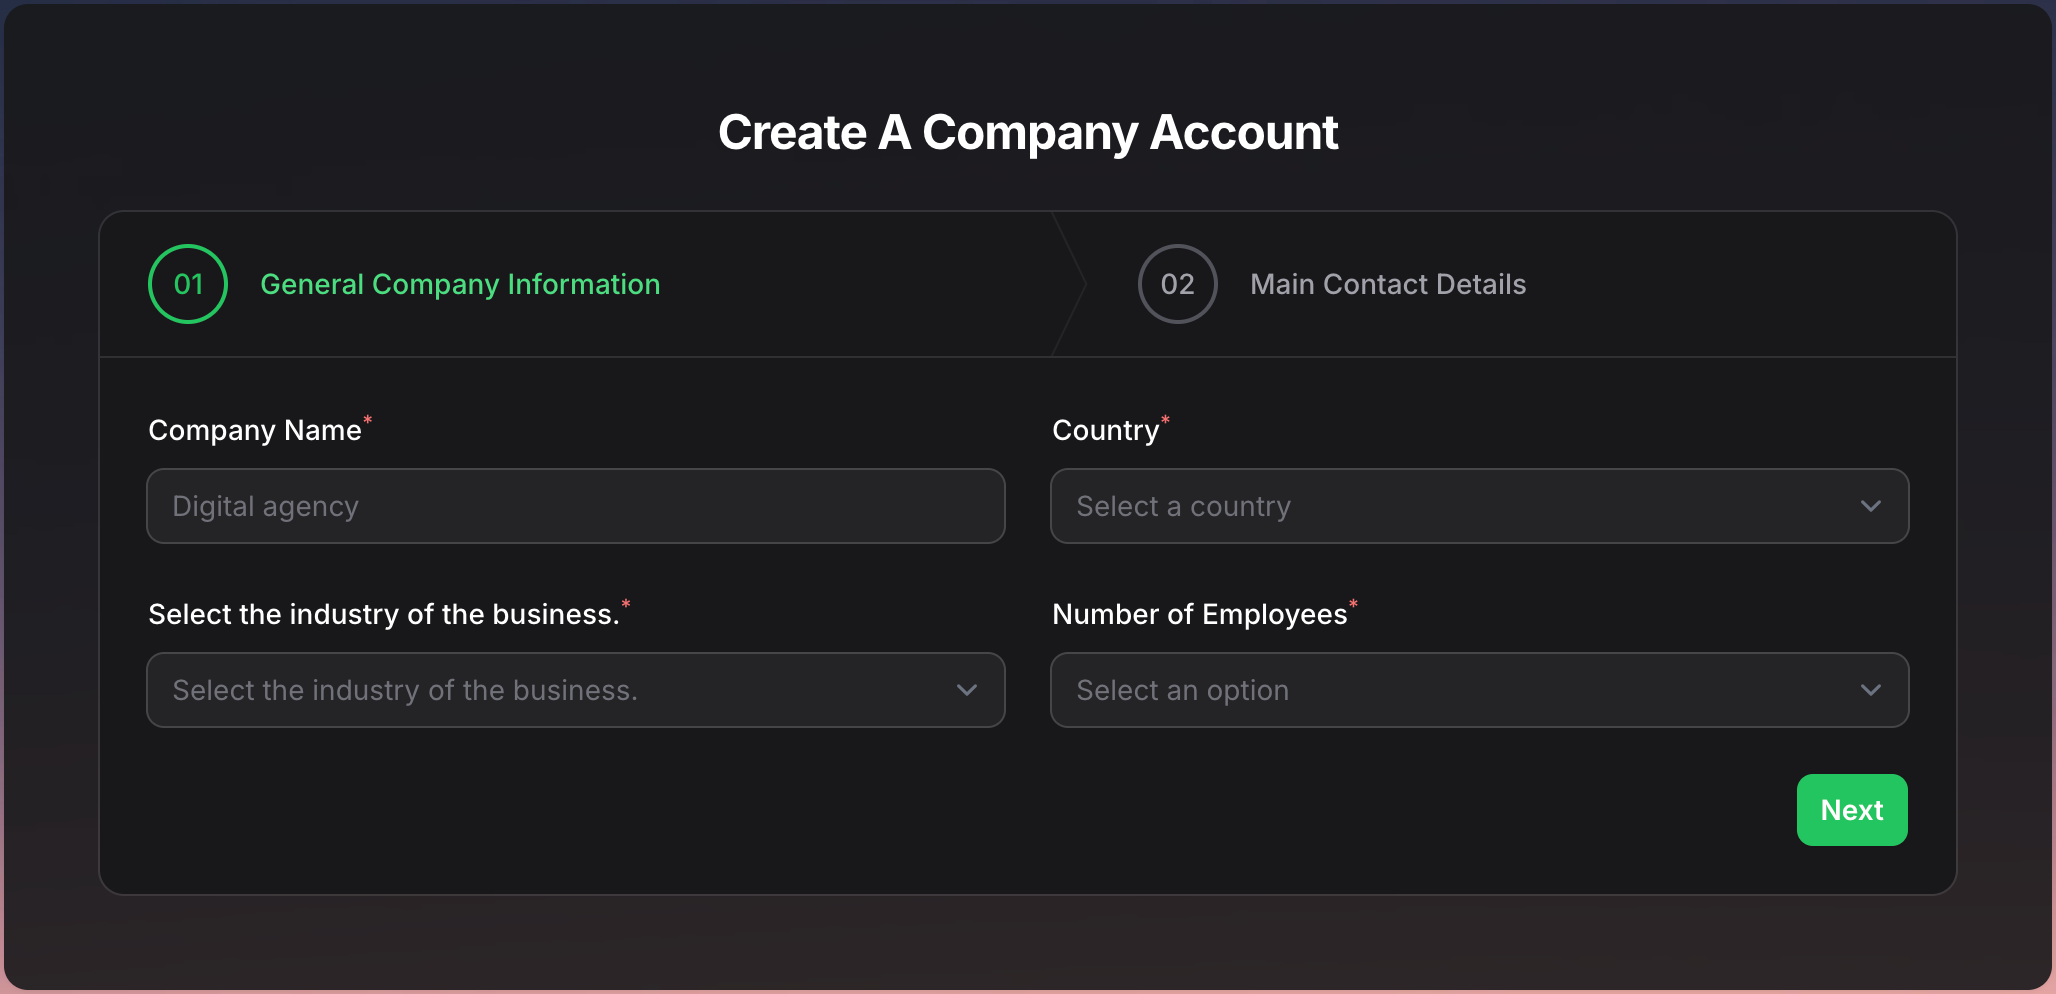 These details help us tailor automation suggestions and analytics to your needs.
***
## 🖥 Step 4 — Explore Your Dashboard
Once you’re logged in, you’ll arrive at the **Shortext Dashboard** — the control center of your communication ecosystem.
These details help us tailor automation suggestions and analytics to your needs.
***
## 🖥 Step 4 — Explore Your Dashboard
Once you’re logged in, you’ll arrive at the **Shortext Dashboard** — the control center of your communication ecosystem.
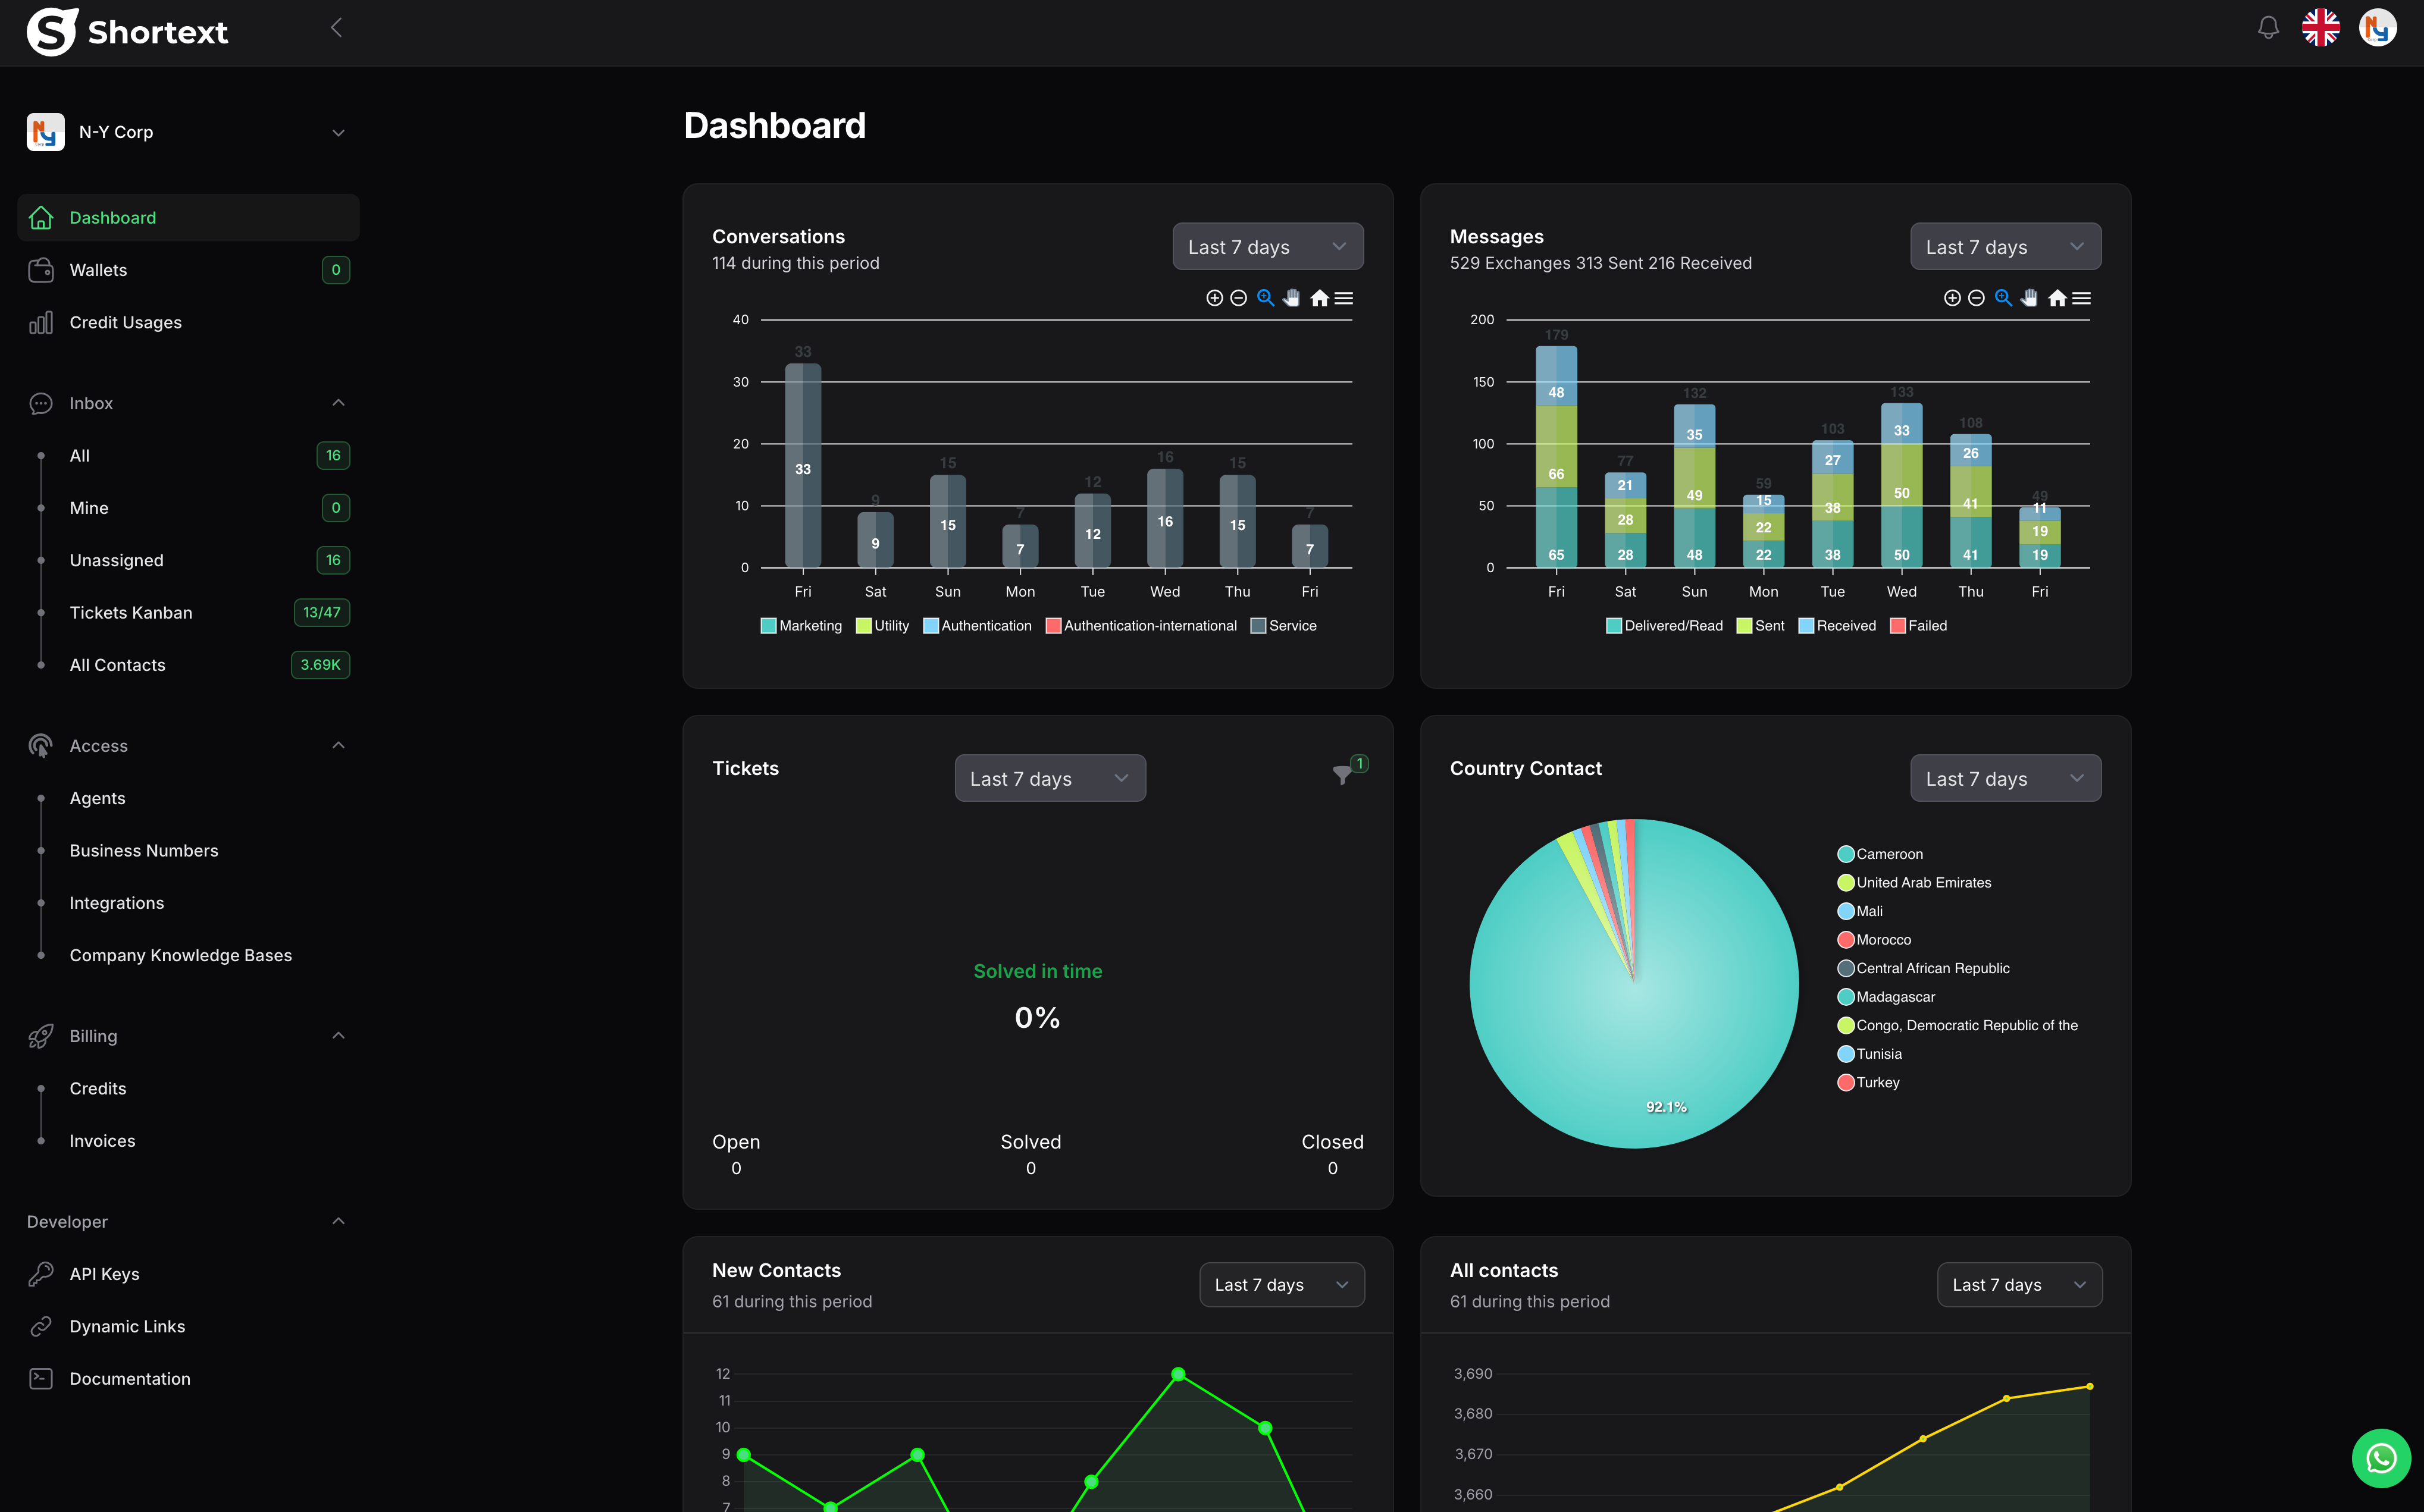 From here, you can:
* Create and manage **AI Agents**
* Monitor **Conversations** and **Sessions**
* Configure **APIs and Integrations**
* Access **Billing and Account Settings**
If this is your first time, explore the sidebar menu to familiarize yourself with key modules like “Agents”, “Messages”, and “Automations”.
***
## ⚙️ Step 5 — Next Steps
You’re all set to start using Shortext 🎉
Continue with:
* [Creating Your First Agent →](/agents/creating-an-agent)
* [Connecting WhatsApp →](/integrations/whatsapp-setup)
* [Testing APIs with Your Agent →](/api/configuration)
***
Need assistance during setup?
You can chat directly with our support agent inside the dashboard or check the **FAQ section**.
From here, you can:
* Create and manage **AI Agents**
* Monitor **Conversations** and **Sessions**
* Configure **APIs and Integrations**
* Access **Billing and Account Settings**
If this is your first time, explore the sidebar menu to familiarize yourself with key modules like “Agents”, “Messages”, and “Automations”.
***
## ⚙️ Step 5 — Next Steps
You’re all set to start using Shortext 🎉
Continue with:
* [Creating Your First Agent →](/agents/creating-an-agent)
* [Connecting WhatsApp →](/integrations/whatsapp-setup)
* [Testing APIs with Your Agent →](/api/configuration)
***
Need assistance during setup?
You can chat directly with our support agent inside the dashboard or check the **FAQ section**.